For the last 20 years, my mom has made a mint chocolate chip ice cream dessert for my birthday. It was adapted from a Better Homes and Gardens recipe I think. I really wanted to veganize it but I specifically didn't want it to taste like coconut. After several attempts at the sauce and multiple ice cream varieties, this version was a smashing success. And better yet, the chocolate sauce was edible off the spoon on its own. Yum. I didn't get great photos of it, it disappeared too quickly. Maybe next time...
Ingredients:
Crust-
Crushed chocolate wafers - 1 pkg (I used one package of Enjoy Life Chocolate Chocolate Chip Cookies and 1 package of Chocolate Graham Teddy's from Whole Foods)
1/2 cup vegan butter melted (I used Miyoko's cultured vegan butter)
1/4 cup sugar
Ice Cream-
3 containers of NadaMoo Mint Chocolate Chip Ice Cream
Chocolate Sauce-
1 cup semisweet chocolate chips (I used the semi sweet chocolate chips from the bulk bin at my local grocery store but any vegan variety would be fine. You could use Enjoy Life brand as well.)
1/3 cup vegan butter (Miyoko's cultured vegan butter)*
1 cup powdered sugar
2 - 2.5 cups oat or cashew milk
1 tsp vanilla
1/4 tsp sea salt
* I tried several varieties including using Earth Balance but I found the flavor to be "off". Miyoko's was the best choice.
Directions:
1. Heat the oat milk or cashew milk to a simmer. Let simmer slowly for 20 minutes or until reduced to 1 1/2 cups. STIR FREQUENTLY.
2. While the milk is reducing, crush the chocolate cookies in a ziplock to crumbs.
3. Stir together crushed cookies, sugar, and melted butter.
4. Press the mixture into the bottom of 9x13 pan and set in freezer for 15-20 minutes.
5. Remove crust from freezer and tear open the cardboard containers of ice cream.
6. Lay the ice cream on it's side and slice into 1/2"-3/4" rounds.
7. Lay over crust filling in gaps as needed to completely cover.
8. Place back in the freezer.
9. To make the chocolate sauce, melt the chocolate chips and vegan butter in small sauce pan on low heat.
10. Add powered sugar and 1 1/2 cups of evaporated milk from above.
11. Cook and stir 20-25 minutes until slightly thickened.
12. Stir in vanilla.
13. Cool sauce completely.
14. Poor over ice cream layer and freeze until firm.
A-MAZ-ING.
Showing posts with label dessert. Show all posts
Sunday, July 17, 2016
Saturday, August 9, 2014
A Very Happy Party
![]() |
| July 2014 |
![]() |
| Aug 2013 |
Today is my littlest one's first birthday. We made it to one. Phew. He is wonderful. He adores his big brother, wants to be on the move always, still has the cutest toothless grin, sucks the third and fourth fingers of his right hand, and LOVES to eat. He has a short fuse, loves to cuddle with his momma and carries his little cream colored lamb everywhere. We decided to have a quiet little get together for his birthday, well, as quiet as it can be with a very excited three year old and a tired, 12 month old, birthday boy. We had blue and white and green table settings and a sweet little lamb cake that I made for him.
I found a tutorial for a Fluffy Lamb Cake at Handmade Charlotte. The cake was a guest post from Lyndsay at Coco Cake Land. Check out both of their blogs for cute cakes and DIY projects. I made some adaptations to this cake. For one, both the cake and frosting are vegan and turned out great! Also, I chose to tone down the amount of icing on the cake with less piping as my kids are small and less sugar is always good.
Lamby Cake
Dairy Free Vanilla Birthday Cake
with Coconut Oil Vanilla "Buttercream" Frosting
For the Cake:
Ingredients
- 2¼ cups all-purpose flour
- 1½ cups sugar
- ¾ teaspoon salt
- ¾ teaspoon baking soda
- 1½ cups cold water
- 3 tablespoons lemon juice
- ¾ cup canola oil
- 1 tablespoon vanilla extract
- ½ teaspoon almond extract (optional)
Directions
- Preheat oven to 350 degrees F.
- Grease and flour two 8" round cake pans.
- In a large bowl, combine flour, sugar, baking soda and salt.
- In a medium bowl, whisk together water, oil, vanilla, and lemon juice.
- Add wet ingredients to dry and combine with whisk. Do not overmix.
- Immediately pour into prepared pans and place into the oven. Bake for 25-30 minutes or until a toothpick inserted in the center comes out clean.
Ingredients
- 6 cups confectioner's sugar
- 2/3 cup refined coconut oil - solid form
- 5 tablespoons Earth Balance Buttery Spread (I used whipped)
- 2 teaspoons vanilla extract
- 6 teaspoons vanilla unsweetended almond milk(or any non-dairy milk)
Directions
- Whip the coconut oil and Earth Balance until it forms peaks.
- Slowly pour in sugar and beat until creamy. Repeat.
- Add milk a teaspoon at a time to desired consistency.
- Add vanilla extract and whip.
To make the Lamb
- Bake your cakes according to the recipe instructions. Let cakes cool completely on wire racks in their pans.
- Make your buttercream according to recipe instructions.
- Place a dollop of buttercream on a cake plate to hold the cake to the plate.
- Remove one of the cake layers from the cake pan. Use a serrated knife to slice the top of your cake so the top is level.
- Place the cake cut-side-up on the cake plate.
- Using an offset spatula or butter knife, spread an equal layer of buttercream on top.
- Remove the second cake layer from your cake pan. Level the second cake layer as you did with the first layer. Place the second cake layer cut-side-down onto the first frosted layer.
- Frost the top and sides of the cake.
- Gently use your bench scraper against the side of the cake to scrape all the way around to smooth out the frosting.
- Use a piping bag and a star tip with a coupler and plastic ring, pipe little rosette dabs around the outside edge of the cake.
- Fill in the top third with more dabs of piped frosting.
To make the ears
Shape two pieces of white fondant into ears. I tinted a little bit of white fondant into pink with the all natural red food coloring and kneaded it in until it was evenly distributed. I found that it took a little more coloring than typical food dyes. Out of the pink fondant, make two small triangles to put in the middle of the ears. Stick them on with a drop of water. Place each ear onto a toothpick. Gently push the other end of the toothpick into the sides of the cake for his sweet little ears.
To make the nose and mouth
Use the pink fondant to make a little triangle and then rolled a small piece of fondant between my hands and shaped. Place on top of the cake and gently press down.
To make the eyes
Tint a little bit of white fondant into blue with the all natural food coloring and kneaded it in until evenly distributed. Roll in between your hands, as you did with the mouth, until it is even. Shape it into lines for the eyes. Place on top of the cake and gently press down.
Tuesday, August 5, 2014
Homemade Dairy-free, Soy Free Nutella
Dairy-Free, Soy-Free Nutella. Nice. This means gluten-free and MSPI safe. Whoo hoo! It does not, however, mean sugar free or healthy. I suppose everyone has those moments. I used to love Nutella. I stopped buying it when I started on the MSPI diet and then when we continued with the dairy free eating, Nutella was crossed off of the list. Until now...
Homemade Nutella
Ingredients
2 cups hazelnuts, roasted and peeled2 tbsp good quality cocoa powder
1/3 cup sugar or coconut sugar
1 tsp vanilla
1-2 tbsp coconut oil melted
Dash Himalayan sea salt
1 cup good quality dark chocolate
1 1/2 tbsp raw honey
1. Preheat oven to 400 degrees
2. Spread hazelnuts on a baking sheet lined with parchment and bake for 8-10 minutes. Watch them closely so they don't burn.
3. Remove from the oven and place into a dish towel. Rub them together until the brown skin starts to come off.
4. Once mostly removed, place the hazelnuts in the food processor (I used my vitamix) and process until it becomes a smooth butter
5. Add in oil, sugar, vanilla, cocoa powder, and salt
7. Blend for another 2-3 minutes until smooth
8. Melt chocolate on the stove or in the microwave; pour into the food processor, along with the honey, and blend until smooth
9. Store in an air-tight container for a week or two. I prefer to keep mine in the cupboard at room temp.
7. Blend for another 2-3 minutes until smooth
8. Melt chocolate on the stove or in the microwave; pour into the food processor, along with the honey, and blend until smooth
9. Store in an air-tight container for a week or two. I prefer to keep mine in the cupboard at room temp.
YUM.
Saturday, June 21, 2014
Vegan Oatmeal Raisin Bars
Vegan Oatmeal Raisin Cookie Bars
Yields 12 servings
Ingredients:
for the bars
1 1/2 cups oats
3/4 cup wheat flour
1/2 teaspoon baking soda
1/8 teaspoon baking powder + 2 teaspoons (divided)
1/4 teaspoon salt
1/4 cup melted Earth Balance
1/4 cup melted coconut oil
3/4 cup packed light brown sugar
2 Tablespoons water
1 Tablespoon sunflower sunflower seed oil
1/2 teaspoon vanilla extract
3/4 cup raisins
for the glaze
confectioners sugar
Vanilla Almond Milk
Vanilla Extract
2 Tablespoons Earth Balance or Coconut Oil
Directions:
For the bars:
1. Preheat oven to 350 degrees (F). Line an 8 inch X 8 inch baking pan with parchment paper so that it overlaps the sides and set aside.
2. In a small mixing bowl stir together the oats, flour, baking soda, 1/8 teaspoon baking powder and salt.
3. In a small bowl mix the 2 Tablespoons water, 1 Tablespoon sunflower sunflower seed oil, and 2 teaspoons of baking powder and let sit.
4. In a large mixing bowl (or standing mixer) cream the Earth Balance and 1/4 cup coconut oil for about 3 minutes on medium speed. Add the sugar and continue beating until light and fluffy, about another 3 minutes.
5. Add the sunflower seed oil mixture and vanilla and beat, scraping down the bottom and sides of the bowl to make sure it is completely combined.
6. Add the dry ingredients and beat on low speed just until combined. Stir in the raisins.
7. Spread the batter in the prepared baking pan and bake for 25 minutes or until the edges are brown and the middle is light brown and set. A toothpick will not come out clean from these bars as they will still be a bit moist in the middle.
8. Let cool completely. (This was the hardest part.)
For the glaze:
1. Place the Earth Balance (or coconut oil) and about 1 1/2 cups of confectioners sugar in a bowl. Using a hand mixer, mix a bit and then pour in almond milk 1 Tablespoon at a time until desired drizzling consistency is reached. You may need to add a bit more confectioners sugar, it's ok to play with the proportions.
2. Remove the bars from the pan to a cutting board. Using a spoon, drizzle the glaze over the top and let sit until glaze has crusted over.
3. Cut into bars and serve.
Thursday, April 24, 2014
Chocolate Ganache Mousse Cake
This recipe was adapted from Dr. Anastasia Halldin. Click here to get the original recipe. I substituted out some of the maple syrup for raw honey in the crust and changed the proportions slightly. It is not overly sweet but the rich taste of chocolate is quite satisfying. Yum.
Chocolate Ganache Mousse Cake
Ingredients
Crust
6 tablespoons cocoa powder
1.5 cups Almond Meal (I used finely ground Bob's Redmill.)
2 tablespoons Coconut Oil
2 Tablespoons Raw Honey
2 teaspoons Cinnamon
Filling
2.5 cups Raw Cashews (presoak for at least 4 hours, drain and rinse and discard the water)
1/3 cup Pure maple syrup
2 Tablespoons Raw Honey
1 teaspoon Vanilla extract
6 tablespoons cocoa powder
1/4 teaspoon Sea salt
juice of 1/2 small Lemon
1/2 cup Coconut oil
1/4 cup Almond milk
Ganache:
1/4 cup Coconut oil
1/4 cup cocoa powder
1 teaspoon Vanilla extract
4 tablespoons Pure maple syrup
Pinch of Himalayan Sea Salt
Directions
1. Mix all the crust ingredients to combine. Press into a small cheesecake form and distribute it evenly with your hands or spatula.
2. Blend all filling ingredients until very smooth. Pour the filling over the crust.
3. Freeze the cake for an hour.
4. In a small, heat-proof, metal bowl, combine the ganache ingredients. Place the bowl in a double boiler or over a small saucepan of simmering water. Whisk the bowl's contents until the oil is melted and the ganache is smooth and glossy. Pour the ganache over the cake.
5. Sprinkle with a pinch of Himalayan Sea Salt
6. Place in freezer to set.
7. Remove cake from the freezer one hour prior to serving.
8. Store the leftovers in the freezer.
Wednesday, April 9, 2014
Raw Brownie Truffles
2 weeks of no processed sugars and I feel awesome. Hello, why do I not eat this way all the time? So dumb.
Anywho, everyone still needs to have a little treat now and then, right? My husband and 3 year old taste tested these for me. The three year old was not sold due to the crunchiness but my husband seemed to think they were good. They have not, however, been disappearing from our fridge the way other sweet treats do and so I think he may have been humoring me. That said, more for me! I LOVE these. Something about the chocolately goodness with the crunchy nuts and the coconut makes them delicious. I thought they might be good frozen too but I found that I prefer them just cold from the fridge or at room temperature. When they are frozen you lose some of the chocolate flavor as well as the whole thing is more crunchy so out the window goes the fantastic texture combination. Whatever your preference, if you are a chocolate lover these should go on your "Recipes to Try" list. I am going to make a bunch for my long runs as I think they would be great on the trails.
Ingredients
- 1 cup cacao beans
- 1 cup raw almonds
- 1 cup raw cashews
- 1/2 cup cacao powder
- 1/3-1/2 cup liquid coconut oil
- 1/4 tsp cinnamon
- 3/4 tsp vanilla
- 1/4 tsp Himalayan sea salt
- 1 Tbls raw honey or agave (or to taste)
- 8 Medjool dates without pits
Extras
- cacao powder
- unsweetened fine coconut
- Place everything in you food processor except the dates and combine until crushed. (It will be chunky.)
- Check the consistency. If too crumbly add a bit more coconut oil and pulse to combine.
- When all your ingredients are crushed and the desired consistency, add the dates and keep blending.
- Make sure the dates are mashed thoroughly. You should have a sticky paste like "dough".
- Roll the paste into small balls with your clean hands.
- Roll them in fine unsweetened coconut or cacao powder to lightly coat.
- Place in the fridge for at least 30 min.
Tuesday, March 18, 2014
Halfie Birthday Mint Double Chocolate Brownies
| Serves | 12 |
| Prep time |
| 15 minutes |
| Cook time |
| 20 minutes |
| Total time |
| 35 minutes |
Ingredients
Brownies
- 1/2 cup unsalted butter
- 1/2 cup cocoa powder
- 1 cup granulated sugar
- 2 eggs
- 1/2 teaspoon salt
- 3/4 cups flour
Frosting
- 3/4 cups unsalted butter (softened)
- 2-3 cups powdered sugar
- 1/2 teaspoon peppermint extract
- 3-5 tablespoons milk or cream
- green food coloring
- 1/2 cup mini semi sweet chocolate chips
Directions
| Brownies |
| Step 1 |
| Preheat oven to 350 In a large bowl melt the butter in the microwave. Stir in cocoa powder until dissolved. Stir in sugar until well combined. Add eggs and salt, stirring until well incorporated. Add flour and mix just until combined. Spread batter into a greased 8" square pan and bake for 18-22 minutes or until toothpick inserted in the center of the brownies comes out with fudgy crumbs. |
| Frosting |
| Step 2 |
| In
a mixing bowl beat butter until light and fluffy. Add 2 cups of
powdered sugar and 3 Tbs cream and beat well. Add mint extract and more
sugar/cream if needed until desired consistency is reached. Mix in food
coloring until desired shade of green is accomplished. Stir in chocolate
chips and spread over cooled brownies. Store covered in the refrigerator. |
Read more at http://backforsecondsblog.com/2014/03/fudge-brownies-mint-chocolate-chip-frosting/#M6MmbJAKFyDX6eAM.99
Saturday was E's "halfie" birthday.
![]() |
| A big 3 1/2 year old |
For dessert after dinner I made him Mint Double Chocolate Brownies. He's a big fan of frosting (what 3 1/2 year old isn't) and was glad to see extra chocolate chips.
| Serves | 12 |
| Prep time |
| 15 minutes |
| Cook time |
| 20 minutes |
| Total time |
| 35 minutes |
Ingredients
Brownies
- 1/2 cup unsalted butter
- 1/2 cup cocoa powder
- 1 cup granulated sugar
- 2 eggs
- 1/2 teaspoon salt
- 3/4 cups flour
Frosting
- 3/4 cups unsalted butter (softened)
- 2-3 cups powdered sugar
- 1/2 teaspoon peppermint extract
- 3-5 tablespoons milk or cream
- green food coloring
- 1/2 cup mini semi sweet chocolate chips
Directions
| Brownies |
| Step 1 |
| Preheat oven to 350 In a large bowl melt the butter in the microwave. Stir in cocoa powder until dissolved. Stir in sugar until well combined. Add eggs and salt, stirring until well incorporated. Add flour and mix just until combined. Spread batter into a greased 8" square pan and bake for 18-22 minutes or until toothpick inserted in the center of the brownies comes out with fudgy crumbs. |
| Frosting |
| Step 2 |
| In
a mixing bowl beat butter until light and fluffy. Add 2 cups of
powdered sugar and 3 Tbs cream and beat well. Add mint extract and more
sugar/cream if needed until desired consistency is reached. Mix in food
coloring until desired shade of green is accomplished. Stir in chocolate
chips and spread over cooled brownies. Store covered in the refrigerator. |
Read more at http://backforsecondsblog.com/2014/03/fudge-brownies-mint-chocolate-chip-frosting/#R8HaVXhsZOubgvIx.99
Ingredients
Brownies
1/4 cup + 3 tablespoons water
1 1/2 tablespoons ground flax
1/4 cup + 2 tablespoons sunflower oil
1 1/2 cups unbleached sugar
1 1/2 teaspoons vanilla extract
3/4 cups cocoa powder
3/4 cups unbleached white flour
3/4 cups white whole wheat flour
3/4 teaspoon baking powder
1/2 teaspoon salt
3/4 cup vegan chocolate chips
Frosting
3/4 cup earth balance butter
2-3 cups powdered sugar
1/2 -3/4 tsp peppermint extract (to taste)
3-5 Tablespoons unsweetened original almond milk
1/2 cup vegan chocolate chips
Directions
For the brownies
Preheat your oven to 350°
Line an 8" pan with parchment paper and oil the sides.
Combine flax and water and set aside.
In a bowl, whisk together the oil, sugar, and vanilla.
Add the flax mixture and whisk for 1 minute more.
In another bowl, combine cocoa powder, flours, baking powder, and salt, stirring well.
Pour liquid mixture into the dry ingredients and stir until everything is combined.
Add 3/4 cup vegan chocolate chips and stir until just distributed.
Put the batter into the prepared pan and spread it evenly.
Bake for 26-30 minutes. Do not overcook.
Remove from the oven and let cool for 15 minutes
Lift the brownies from the pan and let cool for 30 minutes more.
For the frosting
Add 2 cups powdered sugar and 3 tablespoons of almond milk and beat well with mixer.
Add peppermint extract and more sugar or milk until spreadable consistency is reached.
Spread over cooled brownies and top with 1/2 cup vegan chocolate chips.
Place in refrigerator for an hour to allow frosting to set.
Sunday, March 2, 2014
Crispy Peanut Butter Bars
After my last post on hummus, my husband commented that it had not gone unnoticed that due to the massive influx of chick peas and tahini, the amount of baked goods had exponentially decreased. I took to the kitchen to make some chocolate chip cookies that turned out pitifully (read tasted good but had a weird soft texture and were quite flat). I then cheated on these as they are technically a "no bake" bar. They do, however, taste like a crispy Reese's Peanut Butter Cup I am happy to report. They also got good reviews all the way around. We eat honey at our house as it is a high vibration food but if you are out on the honey you could certainly use agave or, I suppose, light corn syrup.
Plant Based Chocolate Peanut Butter Rice Crispy Bars
Ingredients:
1 Cup Peanut Butter (I used Jif Natural Creamy)
1/2 Cup Brown Sugar
1/4 Cup Honey
1/2 Teaspoon Pink Himalayan Salt
3 Cups Crisp Rice cereal (I used Trader Joe's brand)
3/4 Cup Vegan Chocolate Chips (I used Enjoy Life mini semi sweet)
1 1/2 Tablespoon Vegan Butter (I used soy free Earth Balance)
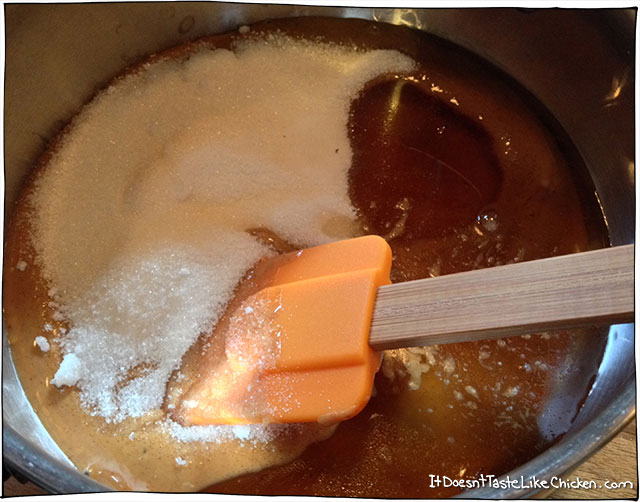
1. Put the peanut butter, sugar, honey, and salt in a pan.
When peanut
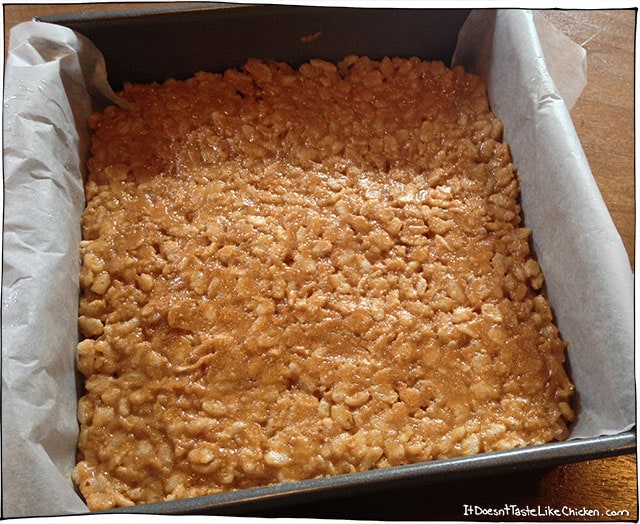
butter mixture gets hot and starts to bubble, remove from heat and stir in rice crispies.
3. Scoop into an 8x8 or 11x7 pan lined with parchment paper.
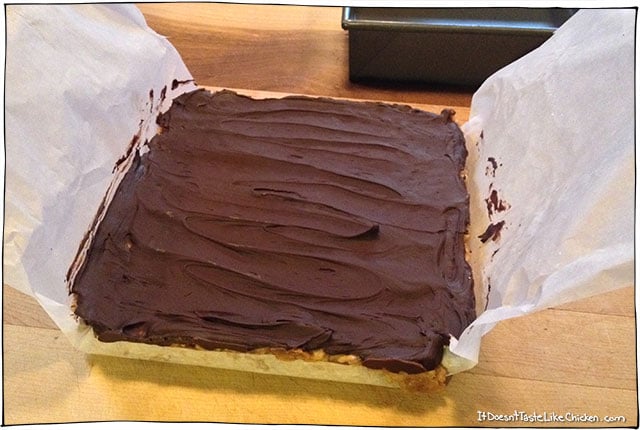
6. Pour melted chocolate on top of the peanut butter crispy layer and spread.
8. Remove from pan using the edges of the parchment.
9. Cut into bars.
10. Try not to eat 25 of them in one sitting. Yikes.
Saturday, August 3, 2013
Not so bad after all... and Guacamole
So the "peanut brittle" I made the other night that I thought was a disaster? Perfectly fine on day two. Don't ask, I have no idea. Go check out Averie Cook's for the recipe! Easy, microwavable, fast, and yummy. Even if you do accidentally use cashews instead of peanuts. Ha!
As for the guacamole, delicious. I don't really love guacamole but my husband does so in the name of love... find this recipe on Picture Perfect Meals. I left out the jalapenos because I didn't have any. No harm done there.
Subscribe to:
Posts (Atom)